ISCRC Presentation Recording Instructions
January 15-18, 2021
In light of the recent Coronavirus (COVID-19) outbreak, the 2021 International School Choice and Reform Conference (ISCRC) will be hosted virtually. Sessions will be pre-recorded and made available to participants through the event platform. This document contains the technical instructions necessary to record a session using the Zoom platform, specifically. If you need to use a different platform, such as Microsoft Teams, for example, please reach out directly to Keri Hunter at keri@edchoice.org.
General Notes:
Start by scheduling a time to record your panel with all presenters and the discussant/chair together. Be sure that the account being used to record your panel is a Zoom Pro or Zoom Business account (rather than a Basic account) so you may record for an hour. This is important, as Zoom Basic accounts will cut participants off after 45 minutes. Each person will need permission to share their screens if they are showing slides. This will need to be set up before the Zoom is launched. Step-by-step instructions for the person setting up your panel’s Zoom are included on the next page. (The person with this responsibility will likely be the session chair).
Total presentation time should be one hour or less. Do not forget to PRESS RECORD! You are encouraged to adhere to the following format:
Do not forget to stop the recording.
We ask that you please do your best to record the session in one take to minimize editing. Unfortunately, things do happen. If you happen to sneeze or stumble over your words once or twice, please make a note of the time at which it occurred, and we will do our best to remove it. If you have any technical issues, please feel free to contact jacob@edchoice.org.
Instructions for Session Chair on Setting Up The Zoom Panel
First, set up your meeting by using the “Meetings” tab on the left-hand side of your screen and selecting “Schedule a Meeting”:
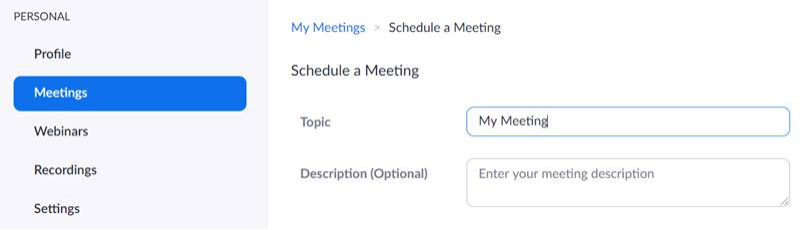
Fill out all the necessary details and save the meeting.
Allowing for Screen Sharing
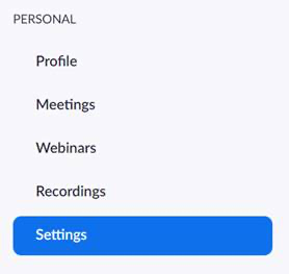
Now, let’s ensure that you have screen sharing enabled. You will access this feature from the “Settings” tab on the left-hand side of your screen:
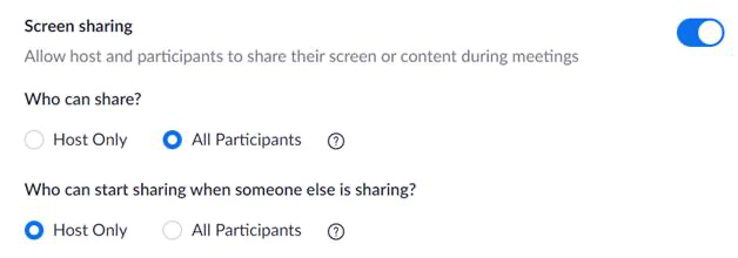
Scroll down to “In Meeting (Basic)” and select these options under “Screen sharing”:
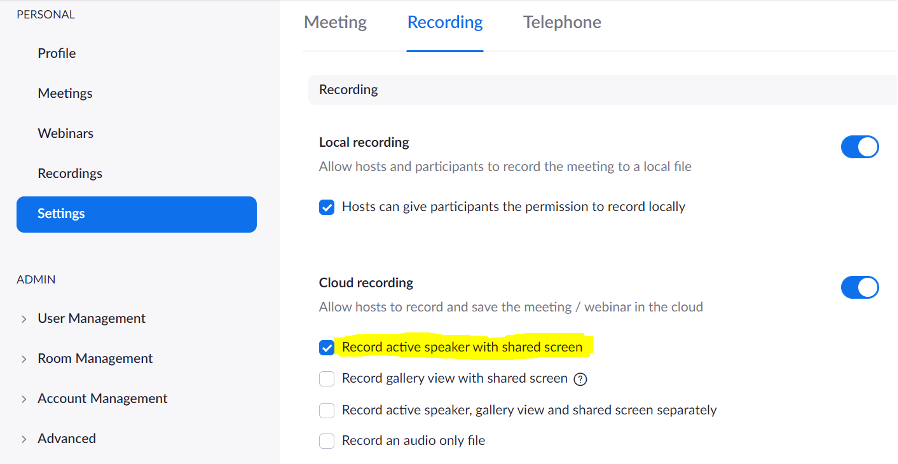
Recording Settings – Active Speaker View with Shared Screen for Cloud Recordings
Next, check to make sure that you are recording your panel with the “active speaker with shared screen” view enabled for cloud recordings. You will access this feature from the “Settings” tab on the left-hand side of your screen, then select the “Recording” tab and make sure that the “Record active speaker view with shared screen” box is ticked:
In Your Meeting – Reminders for Host & Participants
Recording Your Panel’s Zoom Video
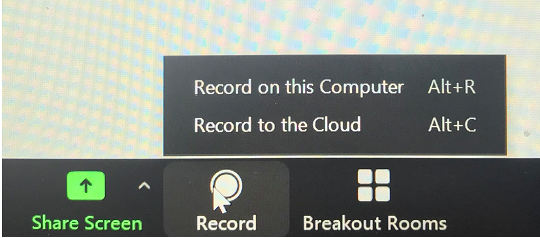
Once you’ve launched your meeting and are ready to record, be sure to hit the “Record” button on your control panel/ribbon and select “Record to the Cloud” for external sharing:
![]()
After hitting the record button, simply check that the top left-hand side of your screen is showing the “Recording…” feature:

When your presentation is finished, remember to invite attendees to join the live Q&A session being held at the end of the day.
Stop the recording when finished.
Finding Your Recording
You can access your recording from the “Recordings” tab on the left-hand side of your screen; be sure to look for it in the appropriate place (“Cloud Recordings” as opposed to “Local Recordings”):

Once finished, please save the file and be sure to name the file the same name as the panel title.
Finally, upload the finished, recorded file to: https://drive.google.com/drive/folders/11DdXfNMVUuFDayNM-m-3XGju6cqlnpDC?usp=sharing
Thank you!